Introduction
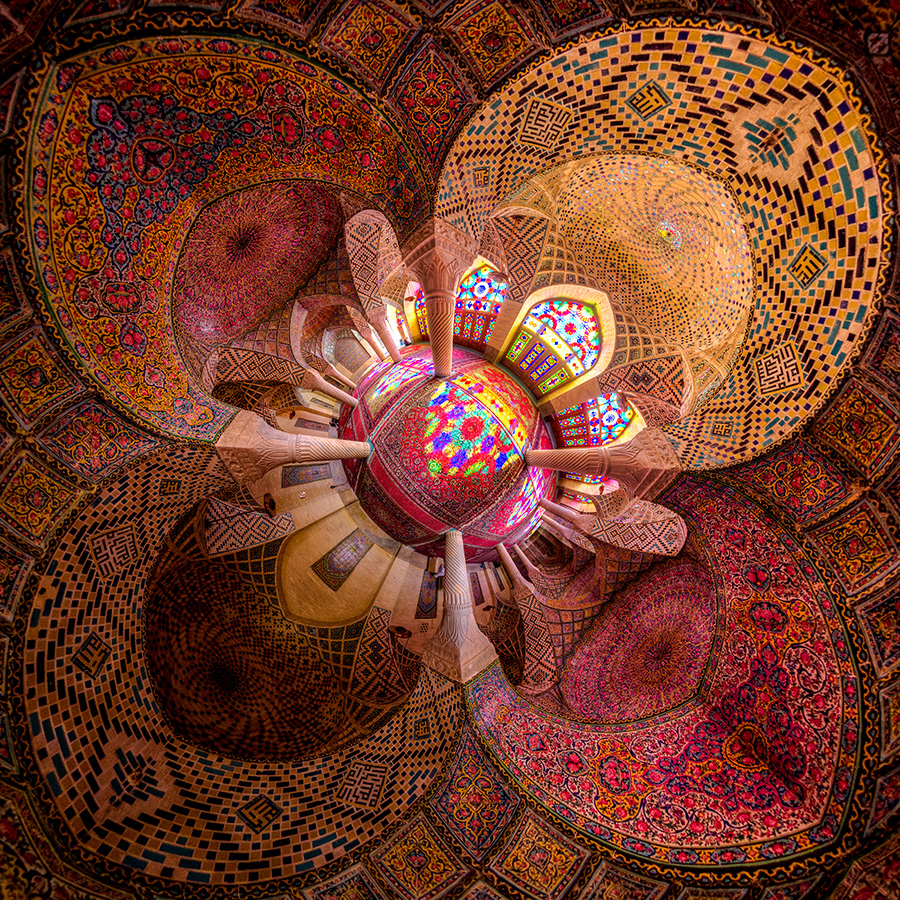
The Pink Mosque, or Nasir al-Mulk Mosque, is an historical site located in Shiraz, Iran. What makes it unique is the intricate mosaic work, the beautiful colored lights coming in through the stained glass windows and its dominant red color. I wanted to capture all of these distinguishing points in a panoramic image using the well-suited 8 mm Sigma lens.
The picture
Only in the late autumn and early winter, when the sun is lower in the sky, does one have access to the intense, broad-spectrum light inside the mosque. Also, this mosque is open to the public during scheduled times, and groups of visitors frequently come and crowd the space. My first challenge was to select the right time of year and hour of the day.
My work is focused on panoramic or wide-angle images of historical sites or beautiful architecture. I find that symmetry can be a key to strong composition when making panoramic interior photographs. Therefore, I positioned my tripod in the exact center point of the great room of the mosque. Here I also imagined the final composition, for I was designing a shoot that would require the stitching together of many photographs into a single final image. This was my second challenge.
I noted that the stream of sunlight would be on the right side of the mosque at around 8 a.m., moving slowly to the left side until noon and then fading quickly. For the maximum symmetry of light, I took my photographs at 10 a.m., a time when every ray of the light coming inside was almost perfectly symmetrical, with the same amount of light on the right side of the windows as was present on the left. I had to work quickly. I would not have had the symmetry of light anymore if I were even five minutes late.
The third challenge was accurately controlling the light, in-camera, of the colorful mosaics – the most distinguishing property of the mosque. I had to select the correct camera adjustments.
- I set my camera on manual mode (M) and adjusted it to make three bracketed shots with exposures of −2.5, 0, +2.5 (two and a half stops under-exposed, metered, and two and a half stops over-exposed).
- I set my diaphragm or aperture to f/8 (which is the sharpest setting for the Sigma 8 mm fisheye lens, allowing for an adequate depth of field).
- My ISO of choice was 500 because I needed to “tonemap” all my images with as little “noise” as possible.
I captured all images in the raw file format. Tonemapping and raw processing will be described in the next section.
My fourth challenge was managing to make a record of the space while crowds were present. Though many people visited inside the mosque, use of my panoramic technique made that easy to handle! I made sure my tripod was fixed in position, and then started taking photos, one after another, until I had satisfied the four angles that I wanted. The images which included people were photographed again after they had moved on. You can replace the original photos with your “second time around” or, if that is not possible, no matter, you can take many photos and mask out people in the final panoramic image. I have to emphasize: do not move your tripod! And do be aware of any lighting change that may happen during your panoramic photography! An example can be the sky: perhaps the sky is cloudy and the clouds move fast, so you do not have direct sunlight in some photos. This will seriously affect your final result!
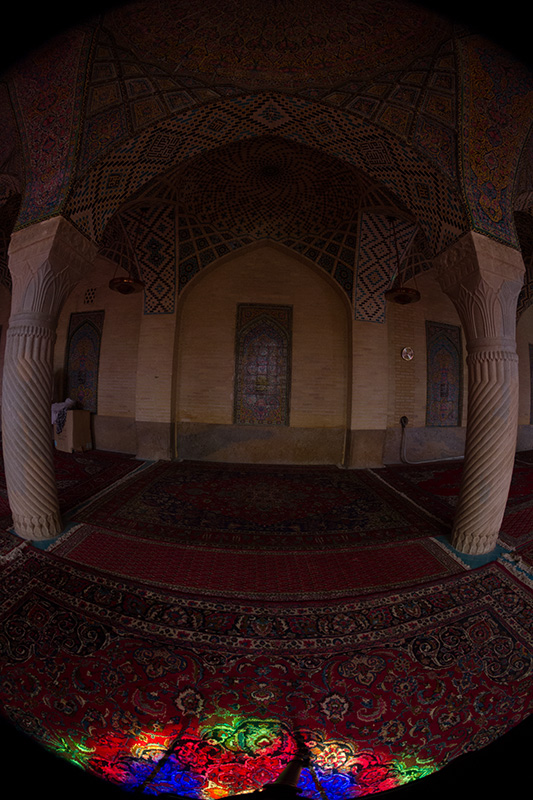
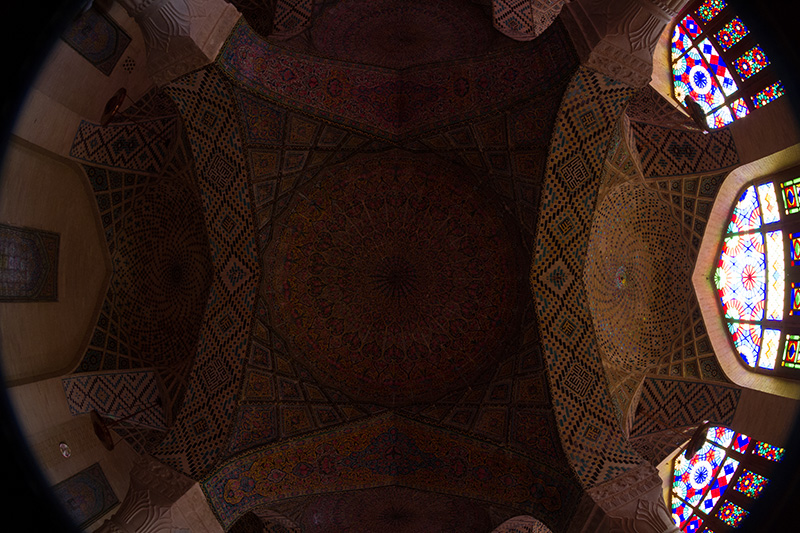
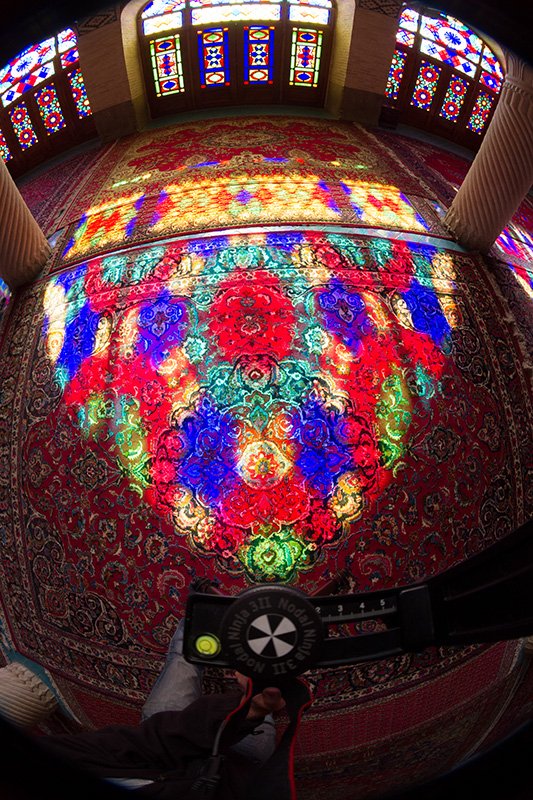
I used an 8 mm fisheye lens, taking only 4 photographs in a circle. My camera was mounted vertically, and I took pictures in each of the four 90-degree axes. Then I took one photo of the ceiling and finally an image pointed directly toward the floor (to mask my tripod). In the final photo of the floor, I moved my tripod a little, but in a way that my camera remained in the exact same position as the other images (it can be done by adjusting the height of each leg: two will be taller and one will be shorter, and it will have some angle with respect to the horizontal level). Also, using a panoramic head is essential to have accurate results and to prevent misalignments. (More info can be found about this technique by searching “how to shoot nadir” on Google.)
Below are examples of the six photos.
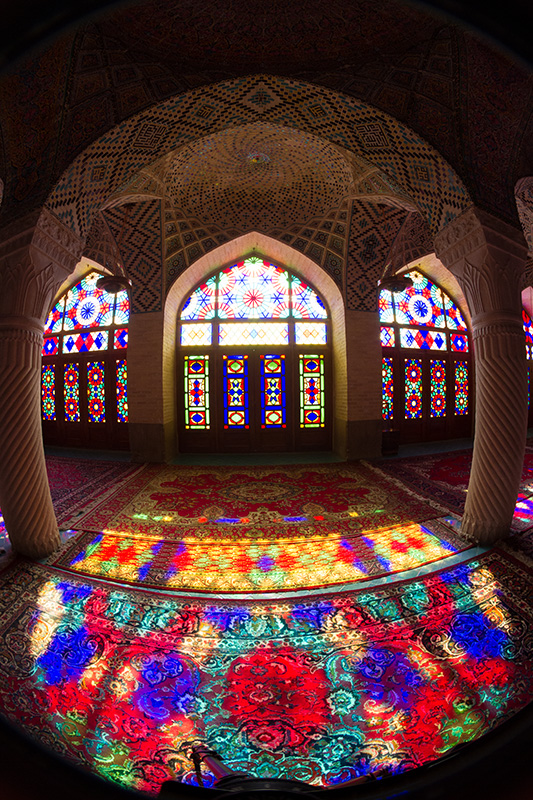
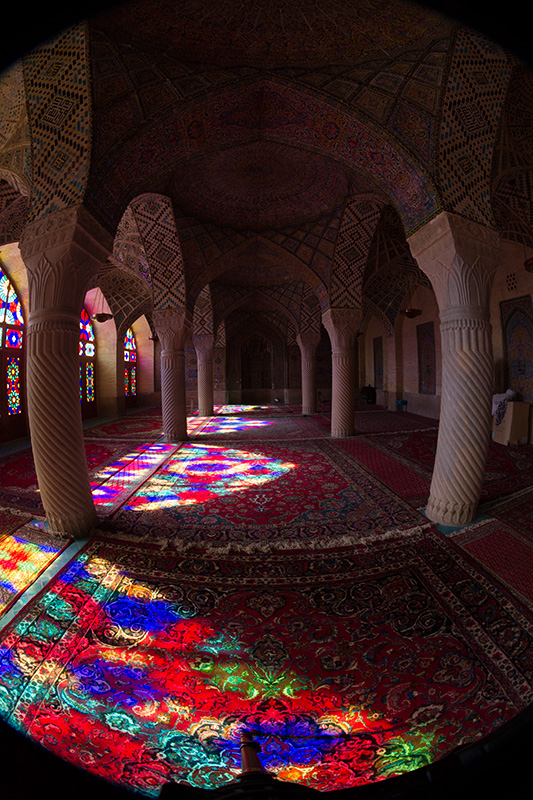
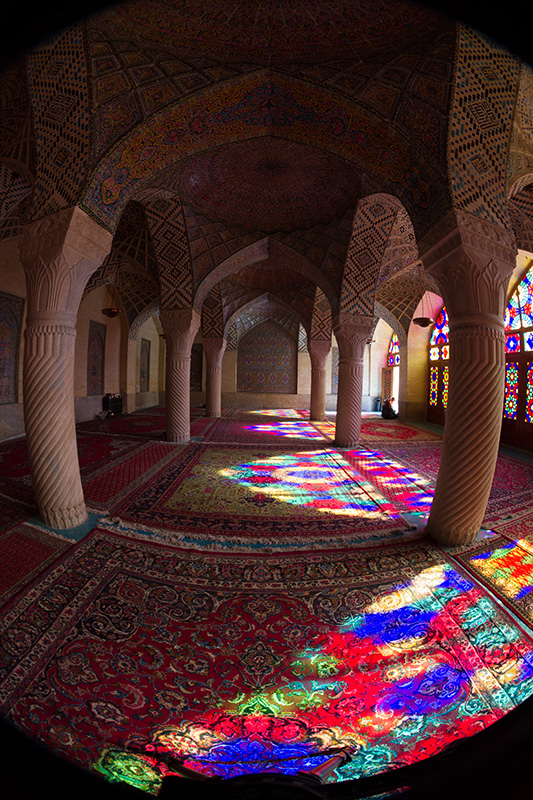
Below are some additional photos of the mosque. They give additional information about the architecture of the mosque.
Additional photo 1. This is a ‘long perspective’ fisheye shot of the stained glass windows.

Additional photo 2. This is a ‘short perspective’ fisheye shot of the stained glass windows.

Post-processing
All images were captured in raw format. The first step was to remove any chromatic aberration and to adjust the white balance so that it was the same for each photo.
I imported my photos into Adobe Lightroom. Then in Lens Corrections, I clicked on Remove Chromatic Aberrations, and then in Basic I adjusted the White Balance and Color Temperature.
After that, I selected all of the images and synced the settings. This applied my choice of settings to all of the images at once.
Finally I exported the images as 16-bit TIFF files.
Then it was time to stitch them together. For that I used PTGui Pro.
If you have some people in the panorama, you can mask them out via the tools available in that software. Also, you need to align your panorama well. Aligning is a very important step to gain smooth results and achieve the desired symmetry.
Since the shots were bracketed, I selected the HDR mode in the program and chose Enable HDR Mode and Link Bracketed Images.
In the Projection settings, I selected Little Planet, and when I exported the three individually bracketed panoramas, I selected Blend Plates.
This way I had three stitched panoramas, each with different exposures, ready to be tone mapped (one that is under-exposed, one spot on, and one over-exposed).
I did the HDR tonemapping using Photomatix Pro. In the list of presets, I used Default, and in Lighting Adjustments I used Natural+. Don’t forget to save your tonemapped image as a 16-bit TIFF file, as this preserves maximum data!
The final post-processing step was to develop the ‘naked’ tonemapped TIFF file. This can be done using Adobe Lightroom or Photoshop. I adjusted this particular panoramic image with these settings: Clarity (+70), Contrast, Black (−50), Shadow (−50) and White (+30), because I cared about the highlights.
Now the panorama is ready!
Hints
- For interior Little Planet photos, always stand exactly in the middle of the building. That will result in accurate symmetry and give you an acceptable composition.
- Always try to find the distinguishing elements of the place that you are going to photograph. Determine your goal and then select your technique. Imagine your final result before starting your panoramic shoot.
- Remember you have to shoot in M (manual mode), and all of your settings need to be similar in each of your images. If you are shooting in raw format, you can sync the White Balance and Color Temperature on your computer with Adobe Camera Raw.